Disaster Response Web Application is a Web app that can help emergency organizations analyze incoming messages and classify the messages into specific categories (e.g. Water, Food, Hospitals, Aid-Related) during a disaster event. The app is based on Nature Language Processing and Random Forest Classifier ML model. The data was collected by Figure Eight and provided by Udacity.
The techniques I used in this project include:
- SQLite in Python
- Bag of Words (BOW)
- Multilabel classification
- Build Machine Learning Pipeline
- Grid Search Cross Validation
- Random Forest Classifier
- K nearest neighbors (KNN)
- Build a Flask web app
You can find the full analysis in my GitHub repo.
Data
The data files associated with this project are from Figure Eight
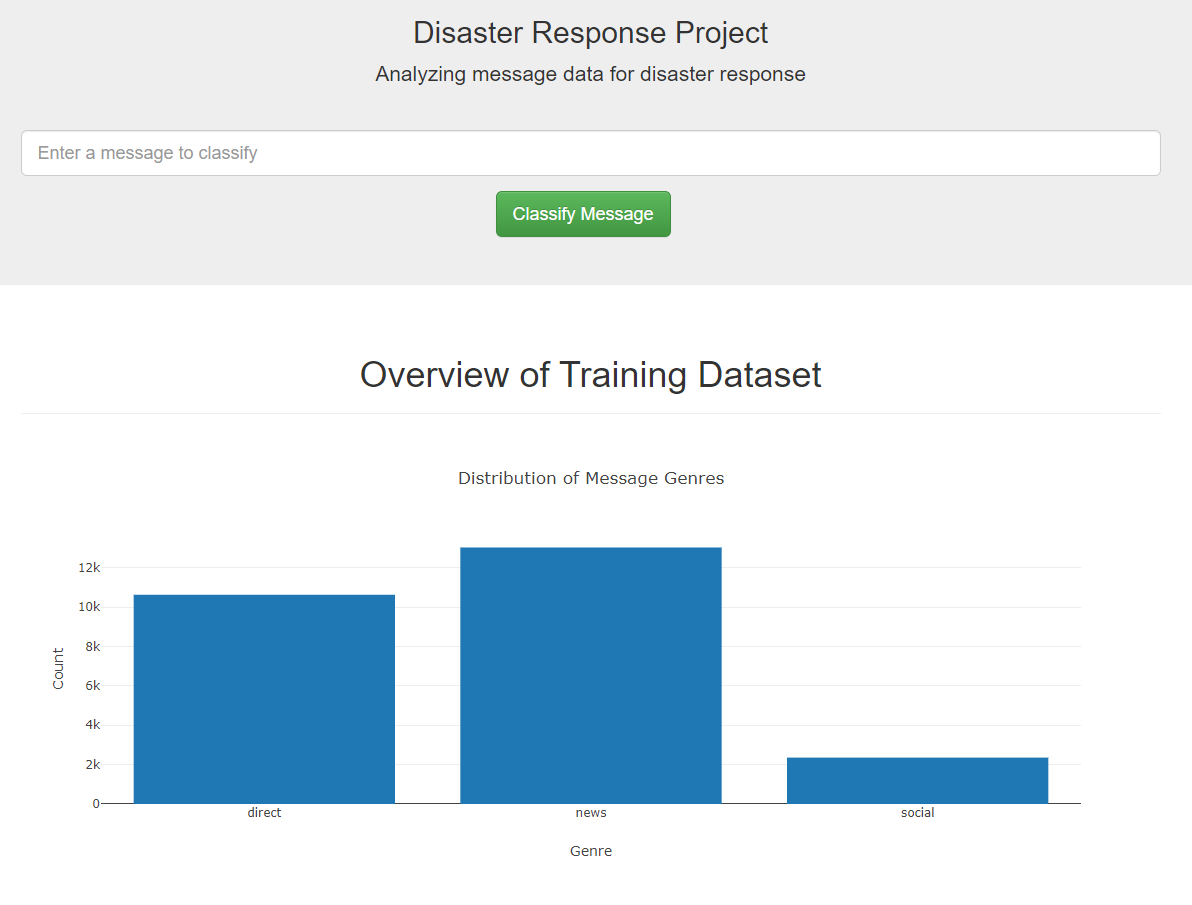
- messages.csv: FIgure Eight provide 26,248 messages
- categories.csv: Raw categories data, total 36 categories.
Project Process
-
ETL Pipeline
- Loads
messagesandcategoriesdataset - Clean data
- Feature Engineering
- Stores it in a SQLite database
- Loads
-
ML Pipeline
- Loads data from the SQLite database
- text processing and machine learning pipeline
- Trains and tunes a model using GridSearchCV
- Exports the model
-
Build web app
- Create HTML templates
- Build Flask web application
Folder Structure
|
|
Full Instructions
-
Installation Install Python 3.5+ Run
pip install -r requirements.txt -
Prepare data
- Clone or download the repo
- Open terminal and navigate to the project folder
- Run
python data/process_data.py data/disaster_messages.csv data/disaster_categories.csv data/DisasterResponse.db
-
Train model 5. Run
python models/train_classifier.py data/DisasterResponse.db models/classifier.pkl -
Start Web app 6. Run
cd app7. Runpython run.py8. Open web browser and go to http://loclhost:3001 or http://0.0.0.0:3001
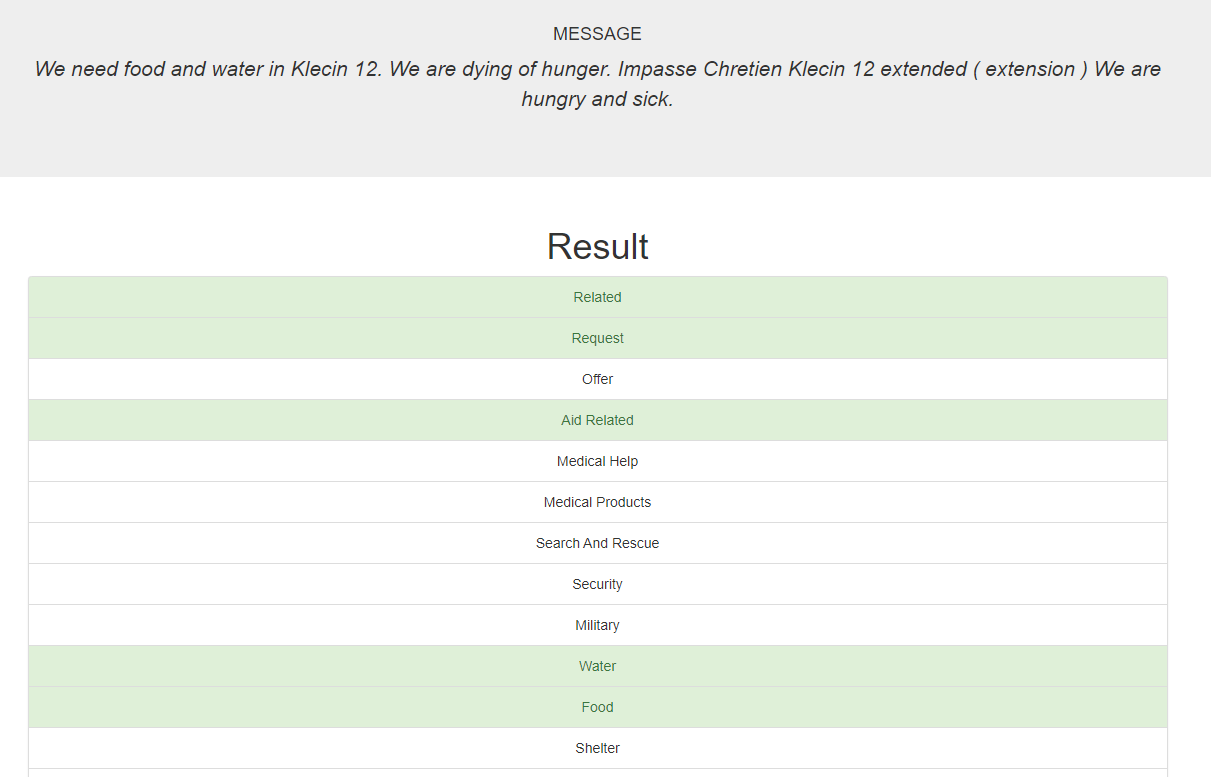
Screen Shot